Description
With the Optical Inspection Kit, you can monitor any portion of the production process or any product being produced for visual confirmation of compliance and/or deviations. All the data can be sent to your network, ERP System or other business intelligence software. It is a NO CODE, plug-and-play solution.
The images captured are analyzed in real-time for anomaly detection to determine quality and yield.
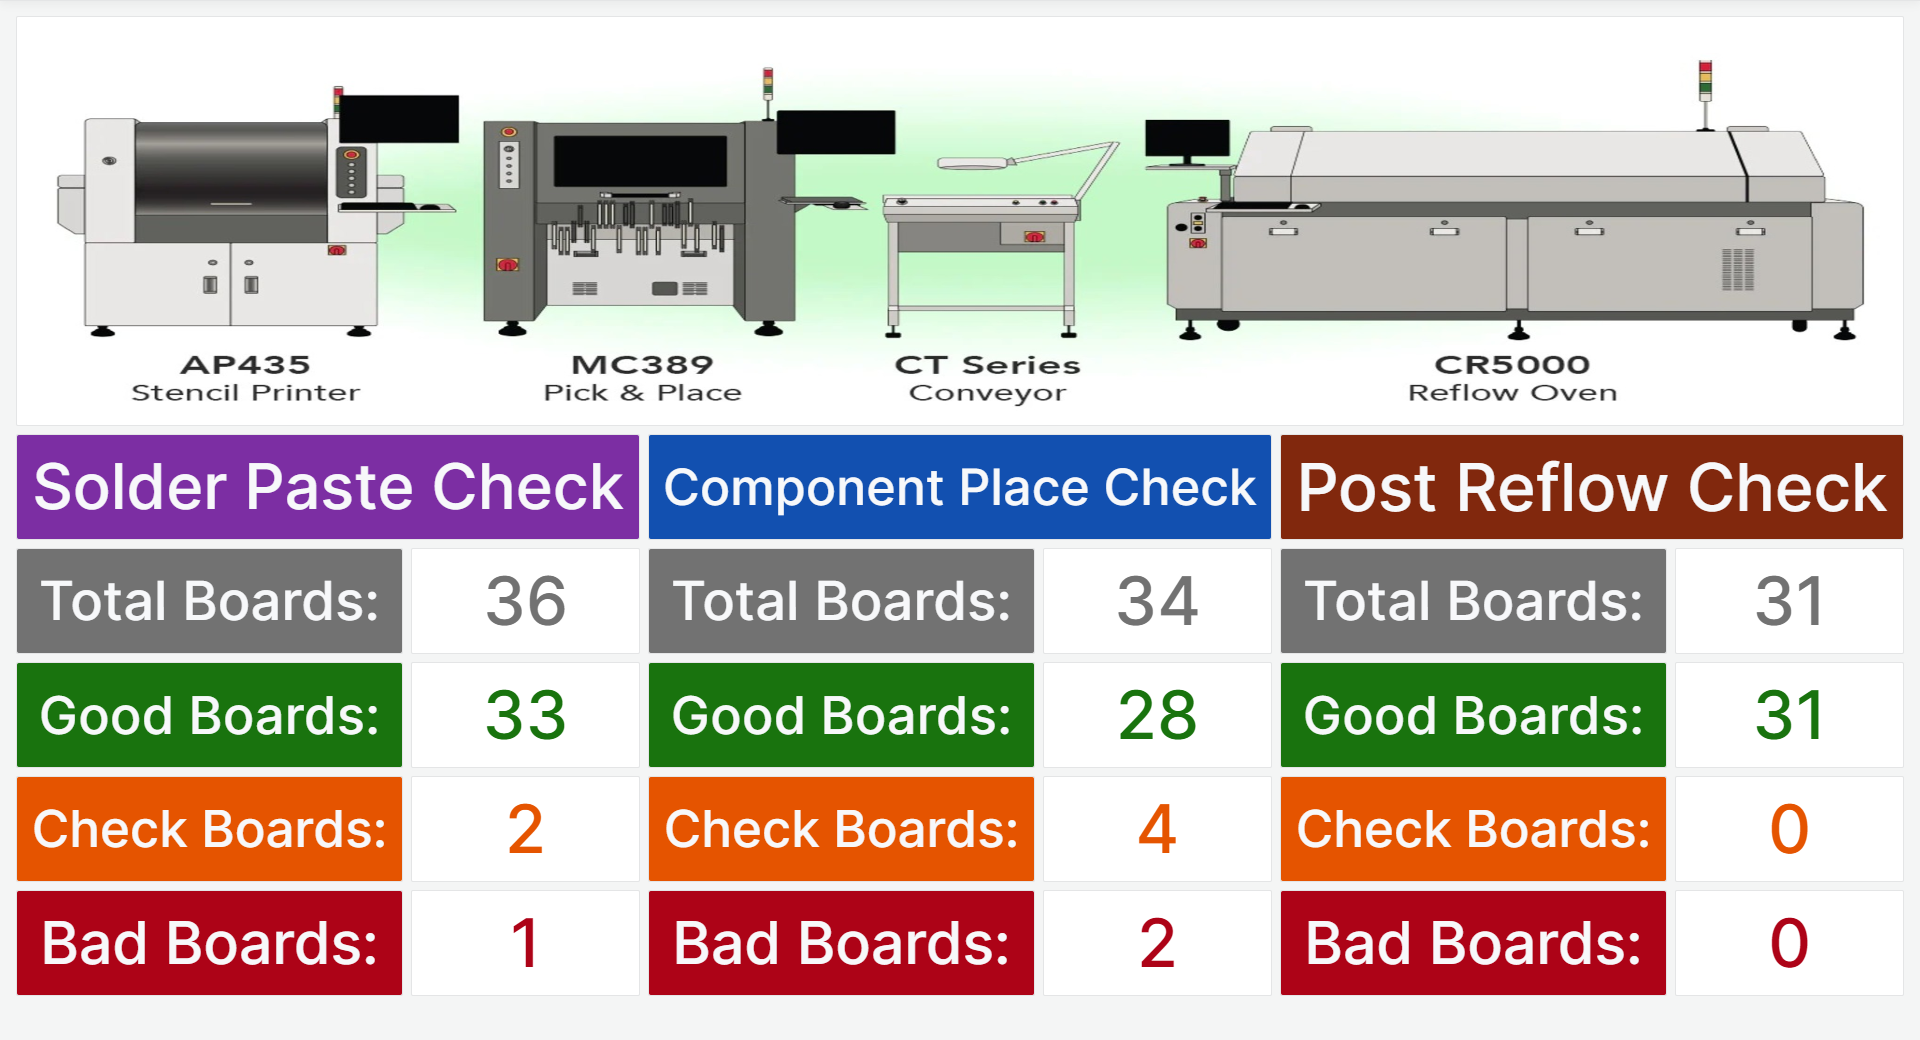
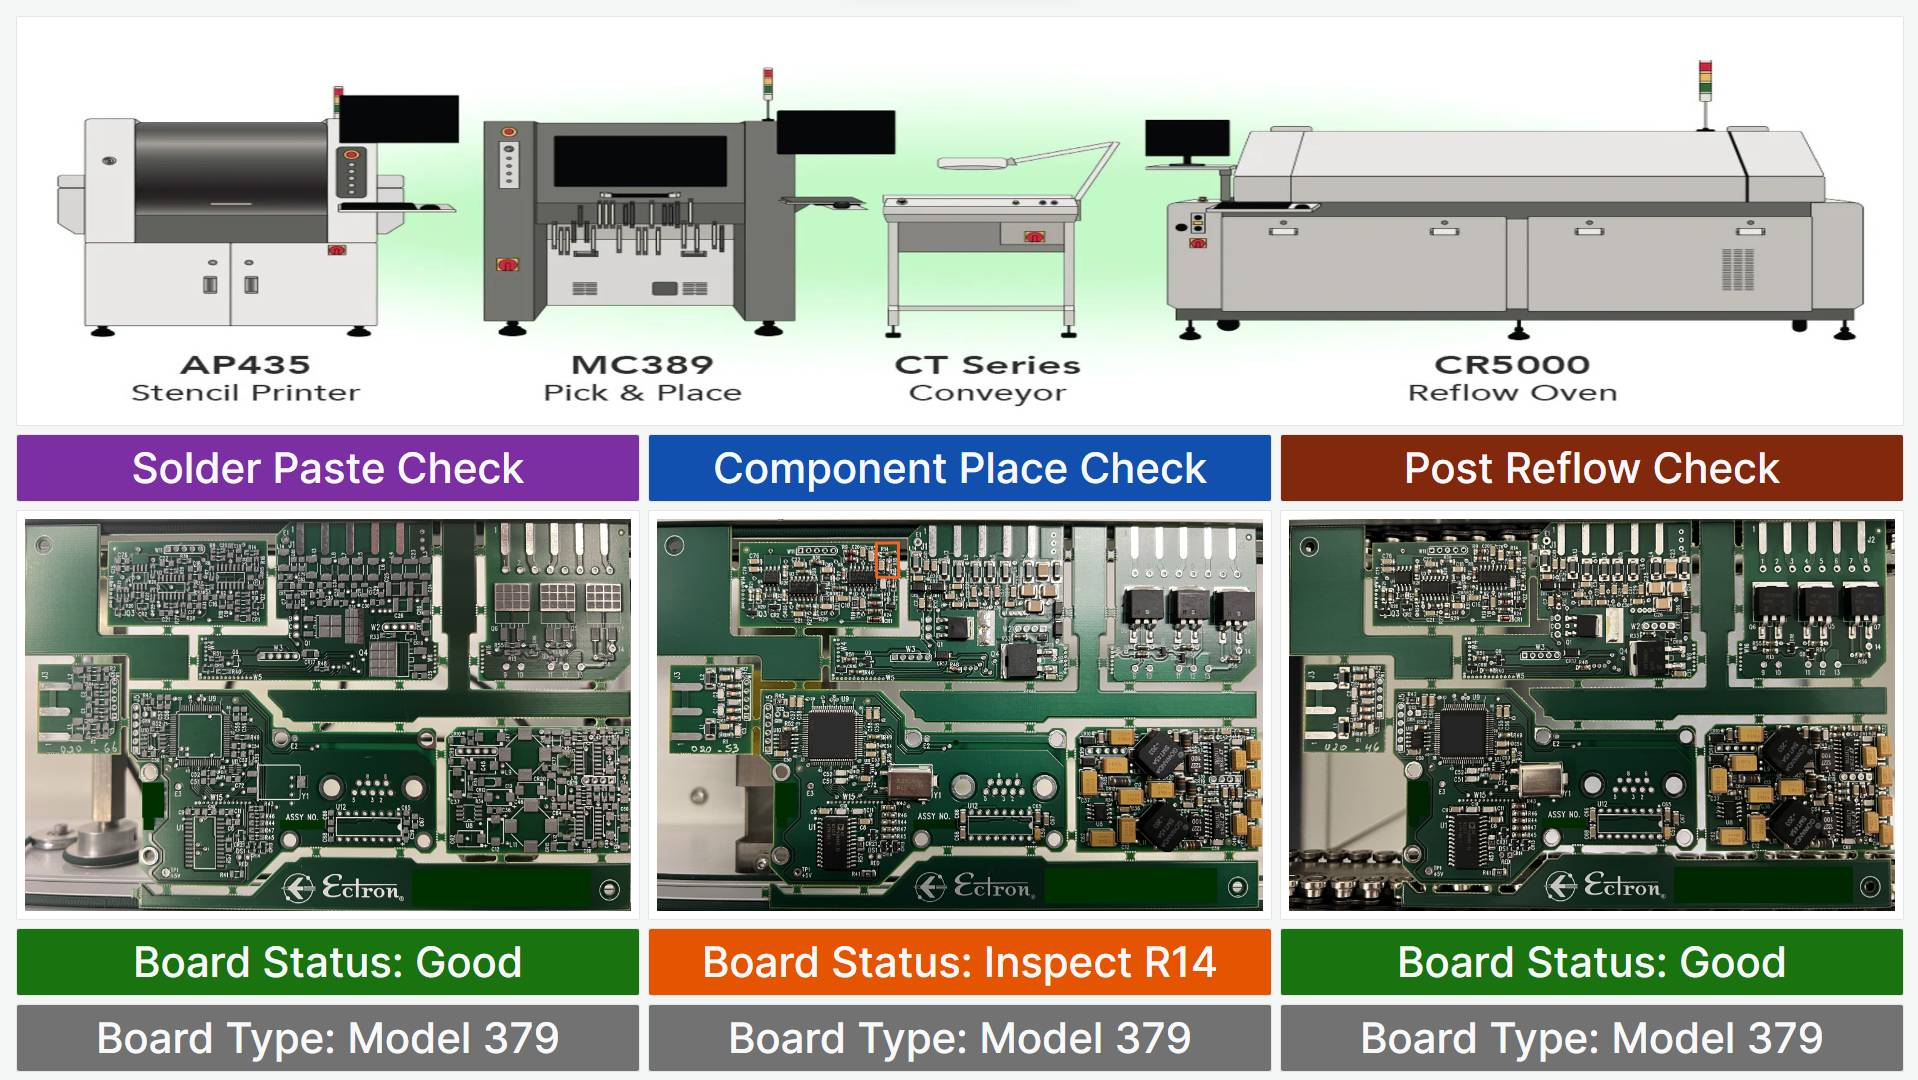
For example, used on an SMT-line, computer boards can be inspected post-stencil print, post-pick-and-place and after emerging from the reflow oven.
WHAT IS MONITORED
- Identify Board Deformation or Other Bare PCB Issues
- Check for Solder Bridges or Improper Stencil Printing
- Confirm Component/Parts Placement
- Idenitfy Defects Including Misaligned Placement, Missing Parts, Damaged Components, Shorts
- Reads PCB Board Number to Align with Job Number, Lot Number
- Yield Per Job
- Can be programmed to optically inspect other types of objects
DATA USAGE
- This solution aids the QA/QC process by recognizing and identifing non-compliant PCBs including pinpointing the precise location of the error(s). With accuracy of over 98%, it becomes an indispensible aid to manual inspections. For maximum effectiveness place along your SMT line to inspect bare PCB, PCB with solder paste, loaded PCB and finished PCB.
STANDARD CONFIGURATION
- 1 Intelligent Edge Node (featuring ECT-MAN-SER)
- 1 Camera
- 1 Camera Stand (w/ attachment)
- 1 USB Cable (to connect the Camera & IEN)
